
Over the years I’ve tried a few systems of floss organization. For years, I used the little cards that you wind the floss around, and keep in small plastic boxes. This system had the advantage of being neat and portable. But there’s a fair bit of work in winding the floss. The reason I abandoned this system in the end was the way it creases the floss – particularly as you get near the end of a skein.
Over the past few years, I’ve used the StitchBow system from DMC and I’m really loving the way it works. I use 3″ binders to store my floss collection.
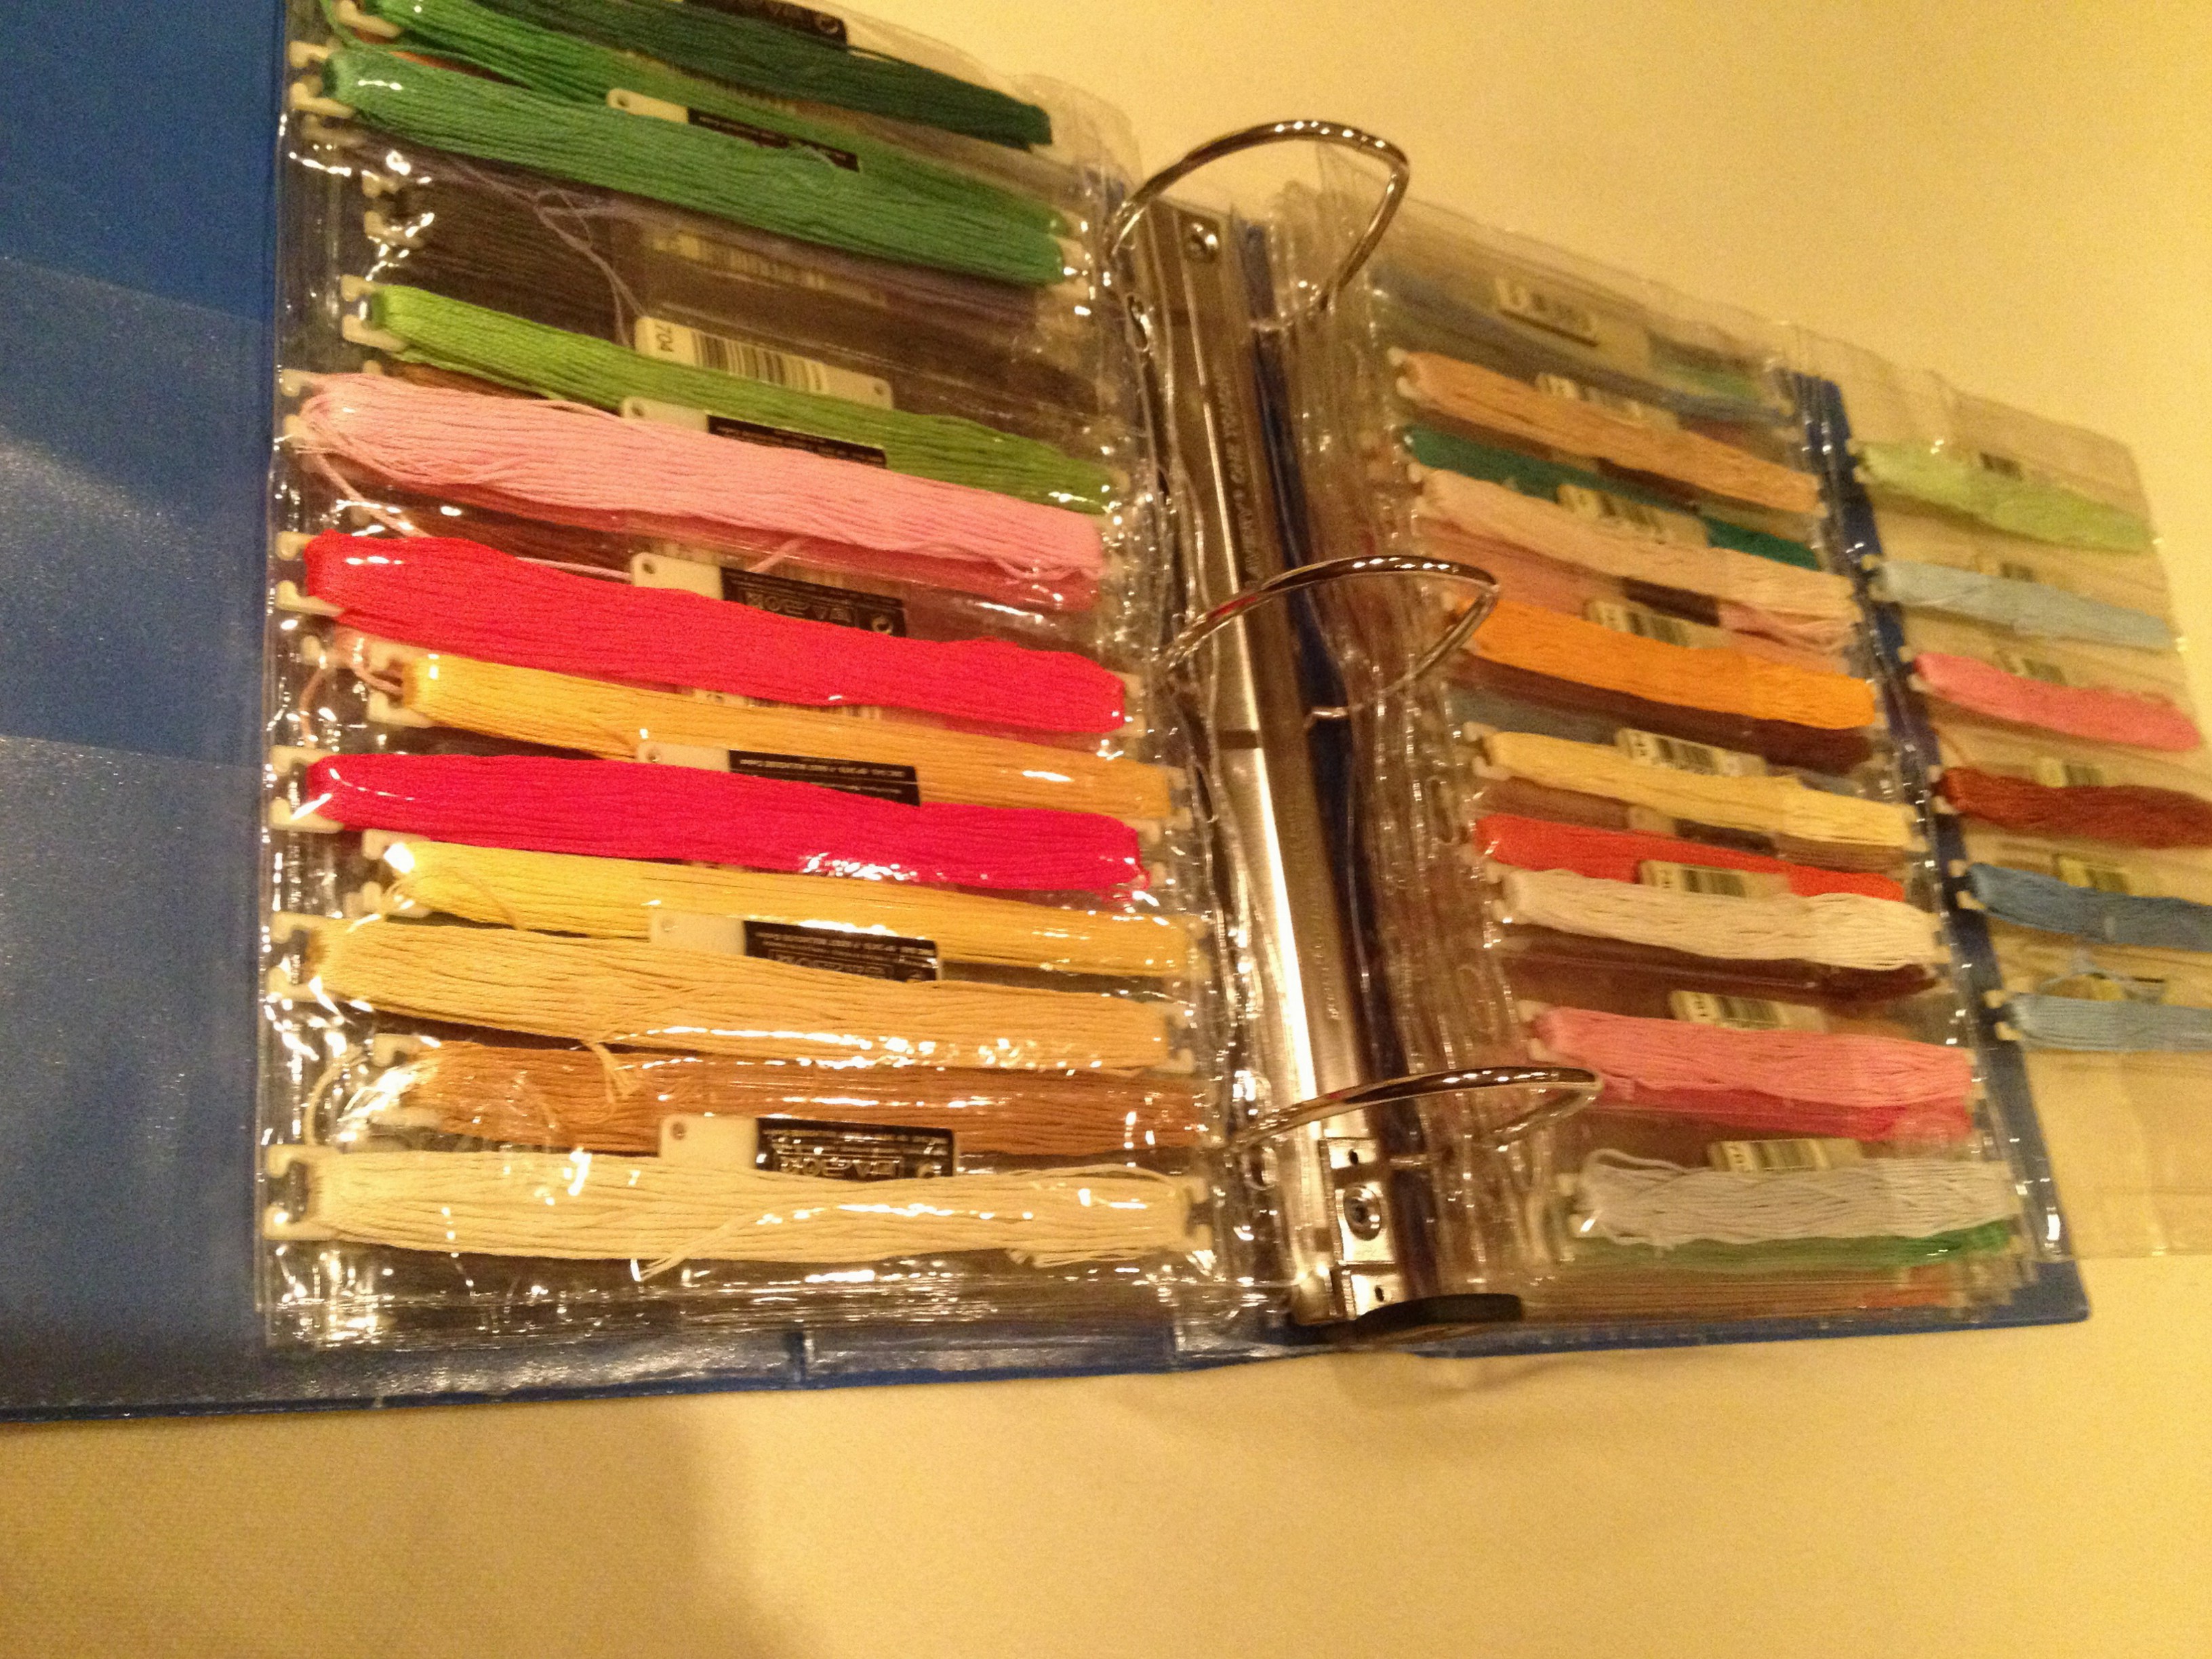
embroidery floss in a 3″ binder

my embroidery floss binder
The plastic stitchbows themselves are inexpensive and quite easy to use – you transfer the floss directly onto them without having to wind it, and the labels with the color ID number are easily inserted.
Once on the stitchbow, the floss slides easily in and out of the plastic binder sleeves. I leave extra sleeves in my binder and space out my existing floss so it’s easy to add new as I purchase.
Another advantage to this system is that the floss is transferred easily into a project binder. Like many, I prefer to work on several projects at once. I keep each project in a “go bag” (more on that in a later post) so when I sit down to stitch, I can easily grab the project I want and everything I need for that project is at my fingertips. Having small children, this system keeps projects accessible to me, but out of reach of little fingers…
As I was saying, each project bag has the needed floss. Depending on how many colors and the size of the pattern, I often keep these in a smaller binder in my go bag. Here’s an example.
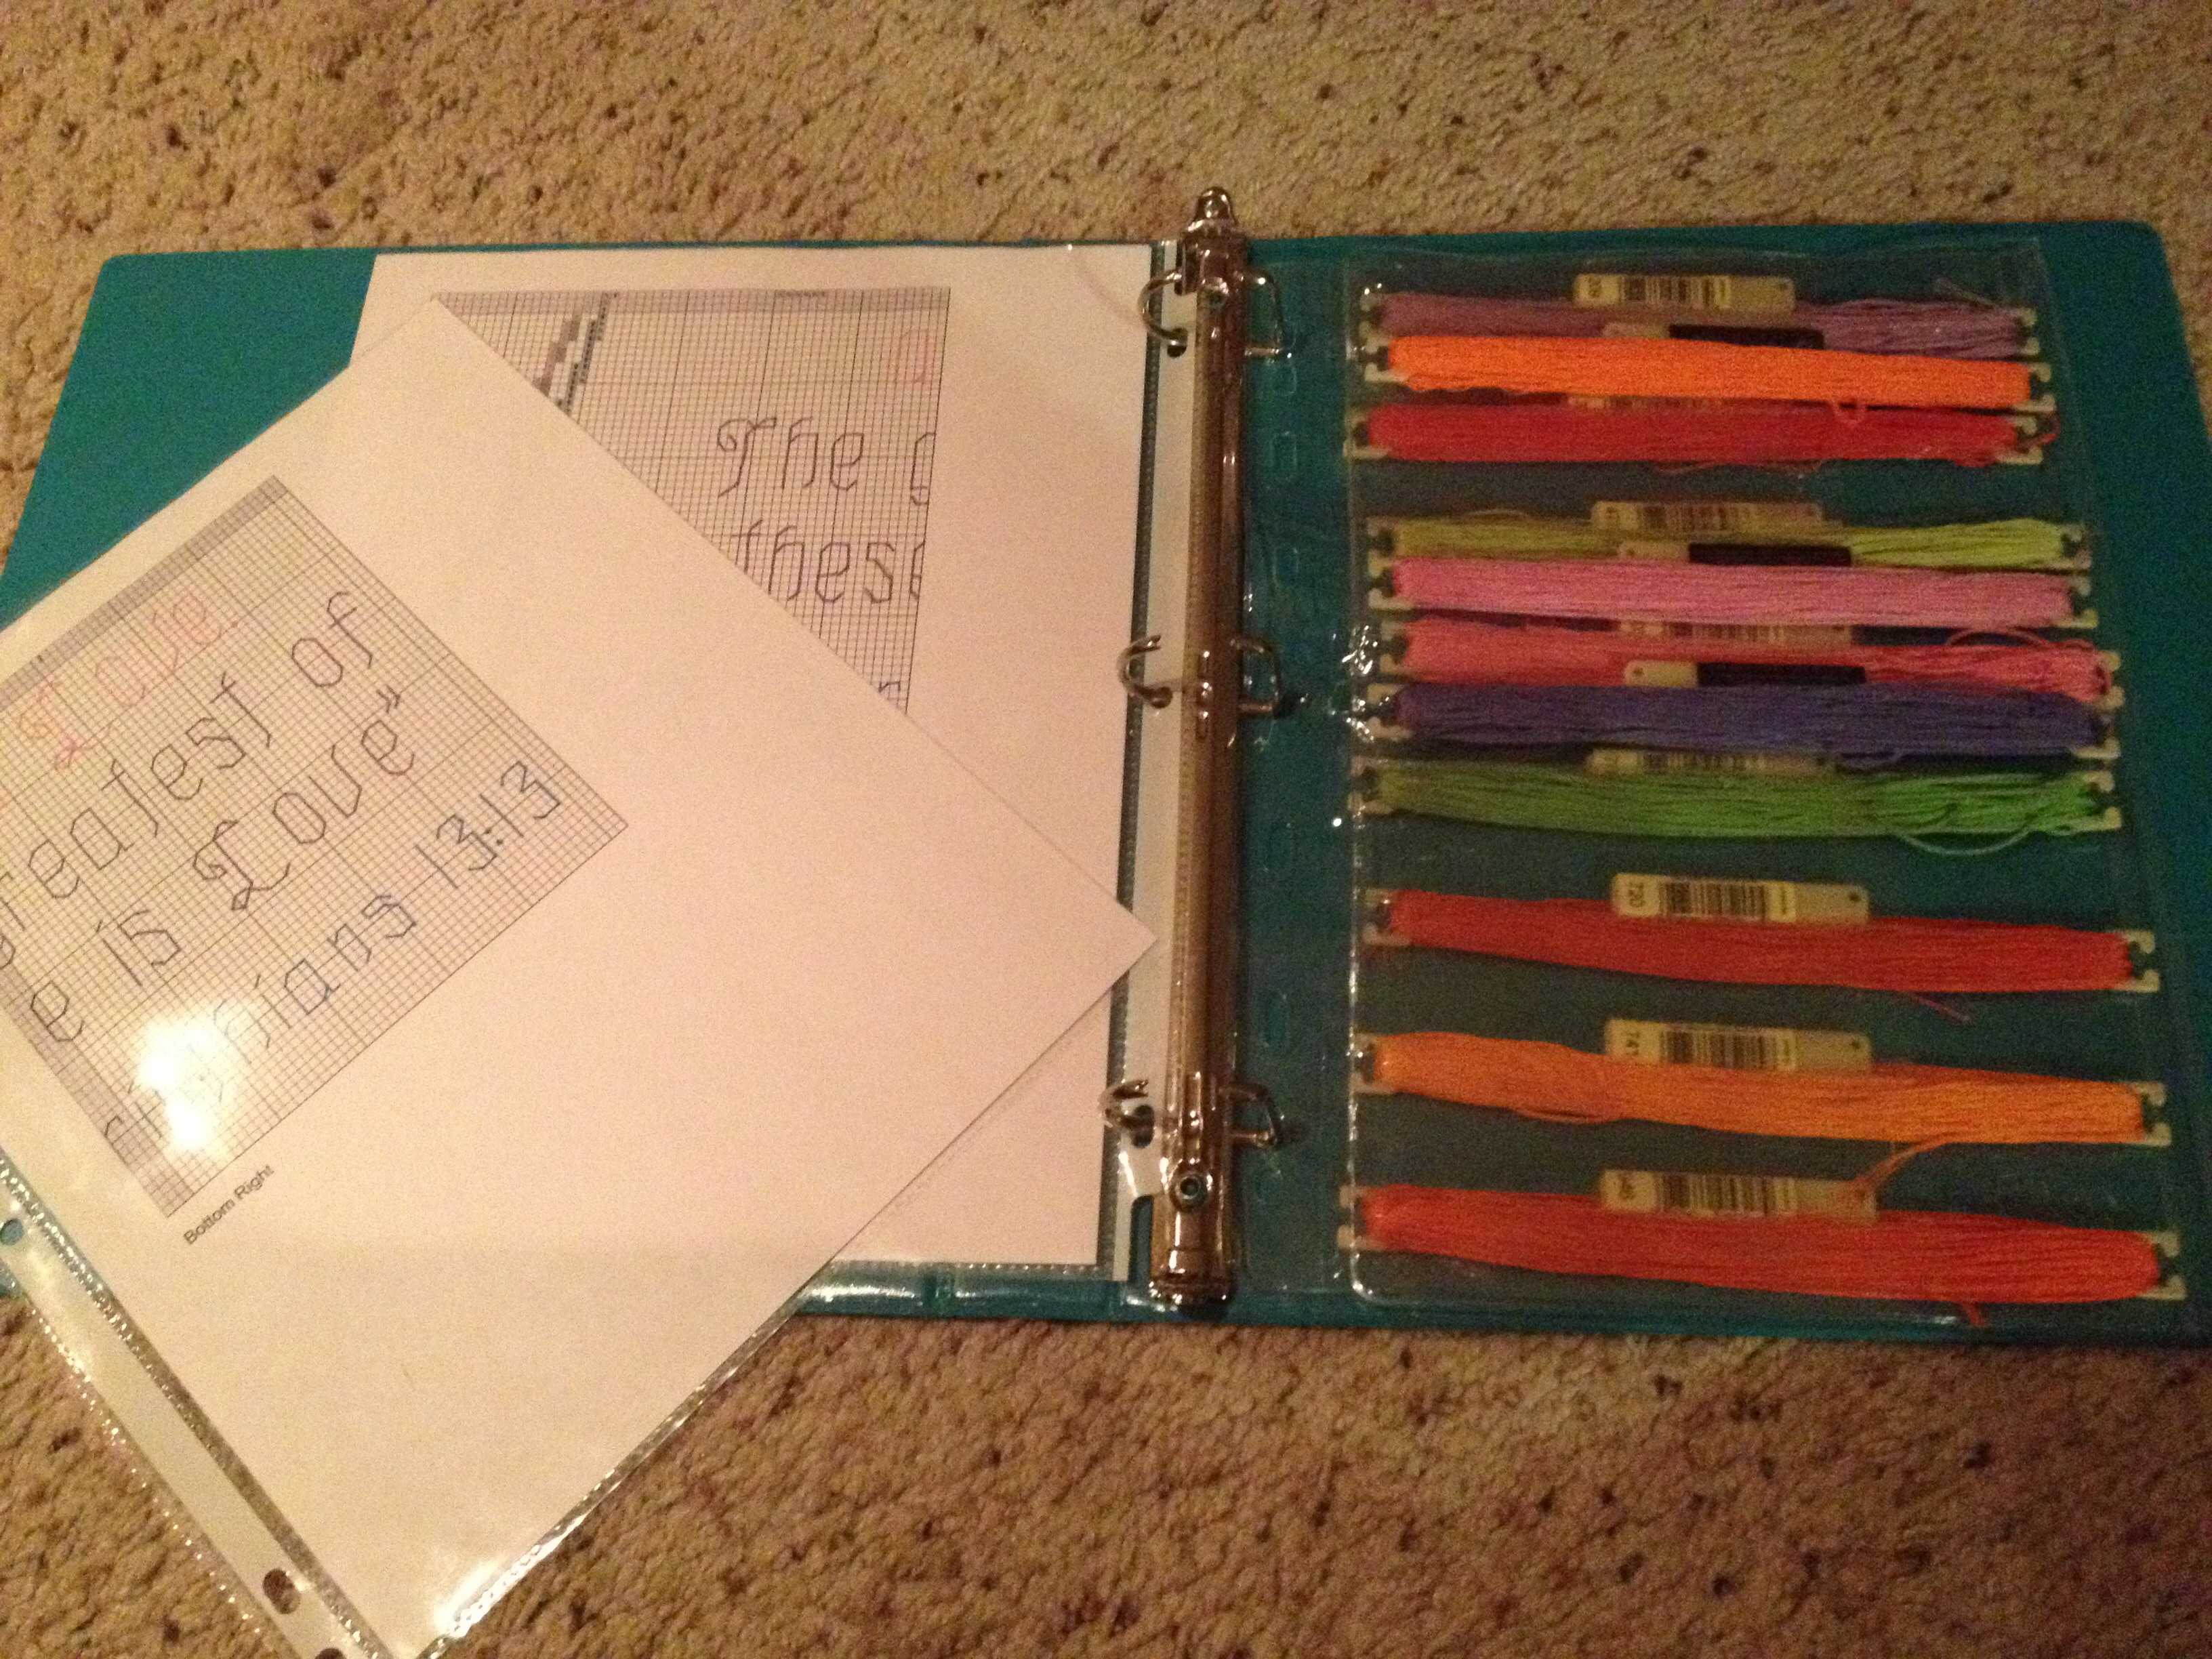
a project binder with pattern and floss inserts

the front cover: usually an image of the project or instructions
Of course small projects don’t necessarily need a binder. More on individual project organization and floss binders in a later post.
So that’s my system. I’d love to hear what works for you!

when I read posts like this I realise that medeival embroidery is very freeing in some ways, as my colours are limited to waht I can dye myself by natural means, so I work with maybe a dozen colours at most, and rarely is shading a consideration. even matching dye batches isn;t that big a worry.
I remember I used to do cross stitch and use such floss 20 years ago, and it was tempting to spend more time organising all the pretty colours than sewing. It felt good to ebay the boxes of floss last year, they’d sat untouched for over a decade
LikeLike
I like your system. I am lazy but I do like having my floss lay out versus it being stuffed into bags and them getting all wound up. I use plastic containers.
http://takingonestitchatatime.com/2015/01/21/tusaljanuary-2015-post/
I nominated your blog for an award:
http://takingonestitchatatime.com/2015/01/31/versatile-bloggers-award/
LikeLike
Hi Carolyn. I hadn’t thought of using tackle containers like that – great idea. I have a few skeins of silk floss that I purchased for a project on my To Do list… maybe I’ll try something like that.
Thanks so much for the nomination! That’s so kind of you!
LikeLike
Your most welcome Amanda!
LikeLike
Your most welcome!
LikeLike
Its not often I see stitchers out there who love the stitch bows. I use a combination of bobbins and floss-a-way bags.
LikeLike
Hi Dani. I haven’t tried the floss-a-way bags. I do sometimes use ziplock snack bags to store extra skeins, but it seems like using lots of bags would be bulky? I have super limited space, which is one reason I like the binders. But to each her own 🙂
LikeLike
I have always wound my floss onto the floss cards and filed them numerically in floss boxes. I did purchase a stitchbow binder for a project, but never did use it. It might just work well for a project…I may have to dig it out and give it a try.
LikeLiked by 1 person
I like the look of those stitch bows, at the moment I’ve got them on little cards in numerical order.
LikeLiked by 1 person
I’ve used the little bobbin cards before. It is nice that they take so little space! But for me the stitch bows are easier 🙂
LikeLike
I love the stitchbow! I found that if I used small cards to re-wrap the floss around that it had a coiled memory and I just think it’s neater if the floss doesn’t want to curl when you go to use it. I store all my floss in numerical order except the ones I am currently using on a project. That all goes in my DMC carrying case with my hoop, scissor, magnetic board and magnified marking bar. Super easy to find colors and to grab and go if I want to travel with it.
LikeLike